Making blog
We had to look back at our prototype and think about how we were going to create the ship. The interior team made a variety of prototypes that played with the shape of the boat from paper, coffee sticks - all sorts!!
We decided the cruise ship would look great as a garment, something a child could wear. We started to develop trousers and prints that were child friendly and reminiscent of the sea!
Last week three group gathered together to create our first prototype to see how we can make the cruise ship. The measurements given by our little inventor were very adventurous but we had to shrink it down.
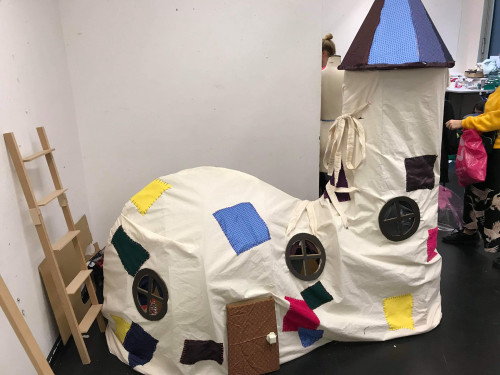
laser cut out of 1 massive piece of wood.

We went down to the wood workshop and worked out how the skeleton is going to look and fit together. Hopefully it stands up!
At the start of Unit X we had to decide on which one of the projects on Little Inventors we wanted to recreate. When deciding on this we had to think about the skills that each of us have and how we would be able to use them in the best way possible. We decided on using ‘The Convenient Umbrella’ invention by Chen age 9, as we all thought this would be a really interesting and realistic product to make. As a team, we came up with ideas for how the umbrella would attach to the bag and how our target audience being a young child would be able to use it.
We began to make our prototype of the product and thought about how big it would need to be. Doing this helped us to quickly visualise what the final outcome would be, and how we could adapt it and make it more user friendly. From this we knew we had to do further research into different materials and mechanisms that we could use which wouldn’t be too heavy for the product, but still be durable and hard wearing.

Maths maths maths

We spent some time looking at how we are going to construct the shoe using cardboard and paper. Loads of fun!

Thomas’ design for the Worry Shredder struck me because he managed to convey a really clever idea with a simple drawing. I could see the shredder helping in three ways. Firstly the act of writing down your worries can be helpful and I thought that shredding it after would feel good. Secondly I thought it would be quite magical when shredder prints out solutions, thirdly everyone feels better after a chocolate!
Thomas wrote that the Worry Shredder “shreds worries and prints out solutions and gives you a chocolate.” So I started at the beginning and researched shredders. I first looked into how to make a shredder, then I looked at hand powered ones, but in the end I decided to buy an electric one. It was important that it was small and had a removable bucket as I would be making my own case. The shredder turned out to be the cheapest part of my make and only cost £19.95!
I took the shredder I bought to my studio and took it to pieces straight away to see how it worked. I thought it would have some complicated electronics and maybe some sensors but I found that the wiring was actually really simple and was just two switches and a mechanical timer. I removed the safety switch and soldered the wires together, The safety switch was there so that it would only shred if it was sitting on top of the bin but wasn’t using that bin so didn’t need it. Now I had a shredding mechanism that worked whenever I wanted it to, I tested it with a few worries and could see this was going to be fun!
I decided to get the mechanism working before I designed the case and the next challenge was getting the printer to print. I bought a receipt printer and an arduino online. Having working in makerspaces for the last five years i’ve seen a lot of projects using these little prototyping boards but I had never used one myself! I set out learning how to get it to work. The first tutorial is how to get the little light on it to blink on and off. It turns out despite all the scary wires and code to be quite easy. They next step was to get a switch working, if i could get an on and off button to work then maybe I could find a way to turn the printer on. Luckily the printer I found some really good instructions on Adafruit.com (https://www.adafruit.com/product/597) and after an evening of playing around (and a bit of soldering power adapters) I had a working printer that could print at the press of a button.
I am no coder so the next step was one of the biggest challenges. I needed to somehow get the printer to print out a random selection of nice thoughts each time the shredder was used. After a lot of searching I found Andrew Nohawk’s blogpost about his compliment printer (https://www.andrewmohawk.com/2018/01/25/compliment-printer/ ). His compliment printer uses the same printer that I bought combined with a big red button. When people hit the button the printer prints out a random compliment for them to take away. Andrew has kindly shared his code on GitHub and I was able to adapt it for Thomas’ Worry Shredder - all I needed to do was replace all his compliments with some solutions to worries.
Now I had the printer working with the push of a button the next step was to somehow get it to print when a piece of card went through the shredder. I had two failures! I found a light /motion sensor and thought that I could get it to trigger when the paper moved in front of it; however it was too sensitive and the printer just kept on printing! I thought that maybe I could use electricity as the trigger for the switch as there is already a switch for the shredder when the paper goes through the shredder. So I wired the arduino up to the switch inside the shredder, this was a very bad idea. I forgot that the shredder runs on 240 volts and the arduino only runs on 5; this meant that when I tried to use the shredder the arduino blew up - an expensive mistake! Luckily I found another arduino in the box-of-random-electronics in the studio and could hook it all up again. Looking at the shredder I realised that i could utilise the switching mechanism that was already in place. Using a limit switch I bolted it into a position where when the paper went through the shredder the switch was pressed. Finally I had a working system!
All I had to do now was make it look good. I took Thomas’ drawing and tweaked the face so that the features became thicker and darker and then I turned the image into a vector line. This meant that I could cut out the face using the laser cutter; I thought it would be fun if the shredded worries came out of the face’s mouth. I made a cardboard case around the shredder so that I could work out the rough dimension and then a modeled that in Sketchup. Once I was happy with the 3D model I used an online box maker to generate a tabbed box template which I could then edit in Inkscape a free vector editing programme. I found some green perspex that matched Thomas’ drawing and then cut all the parts out. For the first time ever, every part fit together perfectly! I only needed to do a few tweaks to fit the printer and and get the correct hole size for the worries to go in. My final touch was to create a pen holder and a place to keep the cards.
Now the shredder was done all that was left was to take it to Raglan Primary and unveil it to Thomas. On our way to the school I bought the final - essential - ingredient, a box of green chocolate to be hidden inside the shredder’s mouth. We arrived at the near the end of their day and two classes where crammed inside one room, as I unveiled the shredder I asked everyone to cross their fingers (I was obviously worried it would not work!). On a countdown from five Thomas inserted his worry into the shredder and slowly, to gasps and oohs, the little printer unscrolled a solution from the shredders nose. Thomas then read out the receipt:
“When you are worried focus on the next 10 seconds only, climbing mountains happens one step at a time. Thanks for shredding your worry, please take a chocolate!”
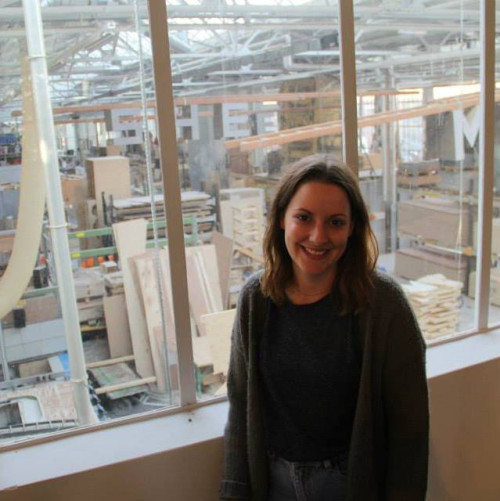
The six-leg chair worked really well, however it looked a bit plain. After giving it a clean up I decided to add some colour. I created a band of yellow on each of the legs, including the two extra ones. This meant that you can really see how the chair works, because the bands of clour line up when the chair is upright.
I chose yellow because Max drawing had a happy child wearing a yellow T-shirt, and yellow is the Little Inventors colour!

Now that the 2 extra legs were attached we almost had a 6 leg chair. However, because of the way they were bolted together, the extra could swivel all the way around 360 degrees. Now, this wasn't suitable at all! I needed to create a way to allow the new legs to swing enough that the supported the chair when tipped back, but nothing more.
I did some research and saw that boxes with lids are often secured with a hinge to stop them from swinging open completely. As well as this I saw that ribbon or tape could be used to do the same thing. Because the extra chair legs needed to sit tightly next the chair I decided that the slimmer ribbon idea would be best. I stapled the ribbon to the back of the chair and the extra leg, and voila! The leg swung enough to support the chair, then when the ribbon was taught it stopped!

For this chair prototype, I decided to use an existing chair and add the extra swinging legs to the back. I found a children's chair and table set in IKEA. In the set, there are two chairs and a table. This meant that I had spare legs that I could use to create the two extra legs for the 6 leg chair.
I put together one of the chairs and then I cut off two legs from one of the chairs to the right size. Then I drilled a hole through the extra legs as well as the completed chair frame at the exact same height. This meant I could bolt the extra legs to the chair.
As well as this, I knew that in order for the extra legs to be stable, they needed to be cut at a 45 degree angle, so when they swung out they would be flat to the ground

I did some research to find out how I might make a 6 leg chair. I came across a funny episode of The Simpsons that show Homer on a chair with 6 legs. Initially, I thought it might work to make a chair that has two extra legs permanently sticking out of the back of the chair at an angle, so that when the person tips over the two extra legs touch the floor and stop them from falling. However Max specified that the two extra legs pop out of the back of the chair so I decided to make two legs that swing out when the person tips back.
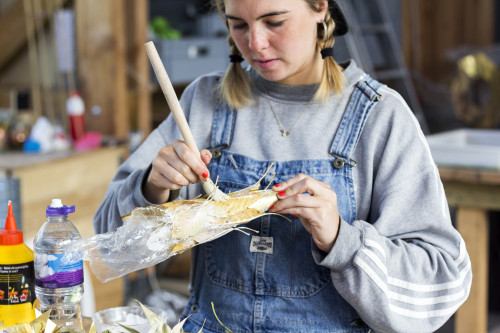
I have finally added the finishing touches to Jessica's Balloon Bike, including the fairy lights, basket and water bottle. I may have added a few extra lights because they looked so pretty!

There's a delicate balance between wonderful and realistic when building a little invention, if you go too far one way or the other then it can turn out unrecognisable, or worse - boring!
For the triple decker bus I wanted to lean into the wonderful by taking that wacky exaggerated height from Alex's design, and ground it in reality with lots of little details from real busses.
I knew the trickiest bit from the start would be the windows, a reflective surface seemed the most sensible idea, it makes them instantly recognisable without having to go to all the detail of building an interior. I wanted to inlay them flush with the rest of the bus or I knew they would look a bit clumpy and would be prone to breaking off, so that dictated the rest of the build. MDF was perfect for the main shell, it's a really versatile material for this sort of work; it can be finished nicely with a lick of paint, and it can be carved very easily with a nice sharp chisel to recess all the window panes.
While the windows dictated the materials, the actual bus components determined the size. I had to buy model wheels, and lights so I would have to fit the bus to these, and made a set of plans by scaling up Alex's design and tracing it onto card then cut all my MDF to size and glued it together. Next I cut all of the windows from mirrored plastic sheet, basing the shapes on photos of real double decker busses. Next I cut the recesses for each window using a very sharp carving tool and the actual windows as templates.
After all the recesses were cut but not fitted I started to prepare it for painting, I had to sand a radius on each edge to make it look a bit more like a real bus, and sand the whole thing all over to get a nice smooth paint job. I sealed the MDF to stop it soaking up all the paint, then primed it in grey to give it a flat base coat, then gave it 2 coats of a lovely bright glossy red paint.
After that I just had to fit the windows and all the extra bits and bobs - lights, a grill made from aluminium mesh, some number plates (L1TTL3 1NV3NT0R), a destination, and a nice big advertisement. Most of these were simple print outs stuck onto very thin plastic sheet with a very wide sellotape.
I really pleased with how it came out, and I hope Alex liked seeing his design come to life!
It turned out to be quite a challenging build, the MDF kept splitting so there was lots of superglue and repairs that were thankfully covered up by that swanky red paint job!
I loved the idea of a volcano that produces candy floss - it was very clever and imaginative of Betsy to use properties of a volcano and apply those to an invention concept.

I loved the idea of a volcano that produces candy floss - it was very clever and imaginative of Betsy to use properties of a volcano and apply those to an invention concept. I started off by making the volcano shape in cardboard. I thought that it would be fun to be able to see the inner workings of the volcano too so I cut a viewing panel into the side of the volcano shape. To create the stone texture on the surface I covered the base shape in crumpled lining paper and covered that in a layer of resin mixed with sawdust. The inside of a volcano has a bowl where the sugar would be spun like a normal candy floss machine. I added funnels and a conveyor to carry the sugar, sweets and toasting marshmallows into the volcano. For the candy floss I used sheeps wool, dyed pink. The volcano has a motor underneath it to show how it would spin the sugar and it also lights up as if it was lava-hot!

Testing the Love heart jacket out and about at night time.
